Thursday, February 25, 2010

Ruby Red Grapefruit and Avocado Salad


As I sit in front of a very angry Pacific Ocean, (our weekend get-away rental is perched, literally, on top of the sea, where the weather isn't exactly cooperating with my idea of beach weather), I have decided to imagine that it's hot outside, (like it was last year), and that I will be eating this salad for lunch...
Yvette and I did this photo shoot ages ago and it kinda got lost in the shuffle, but what better time to share this beautiful salad with you as we could all use a reminder that spring is around the corner, and this salad is perfect for lunch on a warm day. With buttery avocados, crunchy hazelnuts, and juicy pink grapefruit segments, this bright, cheery salad is simply lovely. I like to serve it for brunch with a hearty veggie fritatta and bubbly mimosas.

Wednesday, February 24, 2010

Roasted Garlic and Broccoli Soup


Buying a giant bunch of beautiful broccoli right before we take off for a long weekend may not have been the wisest of decisions, or was it?? Now that my kitchen is filled with the smell of roasted garlic, and dinner is well on it's way to being finished, I'm thinking that my impetuousness was more of a stroke of pure genius.
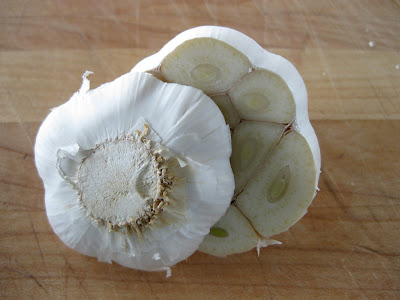
Making veggie soups are simple, and a wonderful way to clean out that fridge. By adding roasted garlic, you turn an ordinary soup in to something a little more special. You might as well roast a few heads of garlic, while you have the oven on - they are great to have on hand. They should keep about a week in the fridge.

Roasted Garlic and Broccoli Soup
Borrowed from The Los Angeles Times

Serves 6 - 8

1 large, plump head of garlic
pinch of salt and pepper
drizzle of olive oil

1 large bunch of broccoli
2 TBLS butter or olive oil
1 medium onion, diced
1 large baking potato, peeled and cubed into 1 '' dice
6 cups chicken or vegetable broth
salt and pepper to taste

Preheat oven to 375.
Slice the top 1/4 off the head of garlic. Drizzle olive oil over head of garlic, season with salt and pepper and place the top back over the head. Wrap in tin foil and roast until tender, about 45 minutes. Set aside to cool.

While garlic is roasting, heat oil or butter in a large pot, and sweat onions for about 5 minutes and add chopped broccoli florets and potato cubes. Add stock and bring to a boil.
Partially cover and simmer for about 30 minutes, or until potato is cooked thoroughly.
Once the roasted garlic is cool enough to handle, squeeze the roasted cloves into the soup.
Season with salt and pepper.

Puree soup in batches, or (better yet!), use an immersion blender. Serve soup hot.

Friday, February 5, 2010

Jamie Oliver's Orange Spiced Doughnuts


"Doughnuts. Is there anything they can't do?"
-Homer Simpson

These take a few hours, and require your attention, but if you are ready to take on the challenge, frying and all, then this are a great doughnut recipe. My suggestion is to make the full recipe if you are having a bunch of friends over - as this yields a large amount. If you happen to be doing this for just a few (two) people, cut this in half. (I did). They won't keep for long, so it's best to fry 'em up and eat 'em warm.


Doughnuts With Old English Spice

1 1/4 oz packet active dry yeast
1/3 cup super fine sugar
3 1/2 cups all-purpose flour
1 1/2 cups plus 2 TBLS whole milk (warmed until tepid)
zest of 2 lemons
zest of 1 orange
5 1/2 TBLS butter, softened and cubed
1 3/4 pints vegetable oil

For flavored sugar:

1/2 cup superfine sugar
1 tsp ground cinnamon
1/2 tsp ground nutmeg
1/2 tsp all-spice
zest of 1 lemon
zest of 1 orange
1 vanilla bean, scored lengthwise, seeds removed


Put the yeast in a bowl with a TBLS of sugar and a TBLS of flour and mix in the warm milk. Put in a warm spot until mixture is frothy.
Put the rest of the sugar, flour, butter and zest into a bowl and add add yeast mixture. Bring together with a spoon and form a ball. Use your clean hands to form a nice ball and knead dough for about 5 minutes, or until soft and silky.
Place ball into a bowl, and place a damp towel over it and allow it to rise for about 1 hour, or until it has doubled in size.

Meanwhile, make the flavored sugar by mixing all ingredients in a bowl and set it aside.

When the dough had doubled in size, knock it back by pushing or punching the air out of the dough. This will allow the dough to rise again and the doughnuts will be light and fluffy.
On a floured surface, roll the dough out until it's about 1/2 inch thick.
Cutout about 25 little holes with a glass rim or cookie cutter- about 2" in diameter. Place on greased cookie sheet and place damp cloth on top and allow to double in size, about 45 minutes.

Once they have doubled in size, use a chop stick to pop into the middle of each blob to form a hole.
Time to fry - BE CAREFUL!!! Heat oil in a deep, heavy sauce pan. Check oil temp by dropping a small piece of left over dough into the oil. If it drops and pops back up right away and turns golden after about 1 minute, the oil is hot enough.
Fry doughnuts in batches, about 2 minutes, removing them with a slotted spoon, and setting on paper napkins to drain.
While still hot, dust with flavored sugar and eat warm.


Sunday, January 31, 2010

No. Boxed. Mixes.


I was at the market, in the baking isle, and I saw brownies, mmm, brownies... They looked so good, so chocolate-y, so easy. I instantly grabbed a box and tossed it to my cart. It was with me for quite a while, staring up at me, we were very happy together. This box stayed with me a long while, making it all the way to the checkout line and almost onto the belt, when I realized what I was doing... STOP! I grabbed the box just before it was scanned, and ran it back to the baking isle, right where I had found it. Sorry, I can't do this...it's not you, it's me. I had committed a minor sin in the culinary world... Even when it seems so much more convenient, so much easier, you must stay strong and repeat after me: NO. BOXED. MIXES.

I promise you, these brownies are really simple, quick to mix and it's so much more rewarding to make something this good from scratch. I try to always have dark chocolate, butter, flour, and eggs stocked and ready. If you are well prepared, then this brownie heaven can be yours, too!

Dark Chocolate Brownies
Adapted from Donna Hay, Entertaining.

8 oz. butter (2 sticks)
8 oz. dark chocolate
3 eggs
1 1/2 cup sugar
2 cups all purpose flour
1/2 tsp baking powder
Fleur De Sel to sprinkle on top before baking.

Preheat oven to 350.
Place butter and chocolate in a sauce pan over very low heat and melt, stirring occasionally. Remove from heat and set aside.
Beat eggs and sugar in a bowl until light and thick. Fold the egg mixture with the melted butter and chocolate.
Add flour and baking powder and gently fold through.
Pour mixture into a greased 8 x 8 pan ( I line my pans with parchment after I butter the pan).
Sprinkle some Fleur de Sel on top of wet mix.
Bake for about 35 - 40 minutes, or until set.
Allow to cool and dust with either cocoa powder or powdered sugar.

Makes about 1 dozen squares.
No chocolate for you, Auggie : )

Thursday, January 28, 2010

Wednesday, January 27, 2010

Chicken Wrapped in Pancetta with Leeks and Thyme

I love Jamie Oliver - everything about him makes me happy. I've been following him since he was "The Naked Chef" years ago. I love his cool, hip, reckless style of cooking. To me, he takes away any hint of chef-snobbery, and makes cooking appear un-intimidating and fun, (which is the way it should be!) If you don't have a cookbook of his, I suggest you grab one, any one is well worth the money. His recipes are loosely written, and in way that it feels like he's talking, guiding you through each page, so it's great for any cooking level. This recipe comes from Cook with Jamie, and it is my husband's absolute favorite. The chicken is moist, flavorful, and the leeks are buttery soft and pretty amazing. I like to serve it with a simple arugula salad and rice or cous-cous, to sop up the yummy pan juices.


Chicken Wrapped in Pancetta with Leeks and Thyme
From Cooking with Jamie
Serves 2-4

2 Organic chicken breasts, bone in, skin removed
2 leeks, trimmed and washed
a few sprigs of thyme
about 1 TBLS butter
pinch of sea salt and fresh ground pepper
2 TBLS dry white wine
About 1/4 lb sliced pancetta (I buy hormone, cruelty free)

Preheat oven to 400
In a bowl add chicken, leeks, thyme, salt, pepper, butter and wine.
Toss around and place in a roasting pan. (I lined my pan with tin-foil, per Jamie's suggestion, for easy cleanup).
Wrap chicken breasts with pancetta, place on top of leeks.
Fold the tin foil inwards, to protect leeks from burning.
Drizzle top of chicken with olive oil and place a few sprigs of thyme on top.
Bake for about 45 minutes.

Monday, January 18, 2010

Rainy Day Cookies


Whenever it rains in LA, (which is hardly EVER), I find myself strangely happy, holed up at home, with a hot oven and big appetite. Lucky for me, I was ready for this first round of what will be a week of wet, windy, simply wonderful weather. I had my plan of attack so that I could sit down, mid storm and indulge in freshly baked cookies. This all sounds pretty simple and easy - however, there has been a major shake-up in the world of chocolate chip cookie making. See, these days, you can no longer think of chocolate chip cookies one minute and have them the next - Ooooh nooooo! It's all about patience and foresight. (And a lot of self - control!)

The secret is allowing the dough to rest in the fridge for, ideally, 36 (long) hours until popping into the oven. By doing this, three things happen to create cookie magic: The gluten is given time to relax, causing a less rubbery, but more crisp cookie. Second, the butter, which has been warmed to room temp, can cool and thus won't spread into the other cookies while baking. And finally, the rested flour is given more time to absorb liquids resulting in a crisper, more fully-flavored cookie. (See an interesting NYT article here.). To be honest, I haven't tried the full 36 hour fridge test - however, I did freeze the dough overnight and baked half today and was very happy with the result - a crisp, brown sugary wafer-like cookie. Not bad! In fact, a giant improvement from all those years of making the dough and immediately popping them into the oven, which now appears to be a mortal cookie sin. So, there I was, awaiting the storm, with cookie dough freezing, ready to make it's debut. Just like the much anticipated rain.

Not to overload you with this cookie revelation, BUT, there is another part to this sweet story... I have always baked cookies with all-purpose flour, which yields a more cake-like, fatter cookie. Which is lovely. However, my preference is for a crisper, more wafer-like cookie and to get this result is to use pastry flour. It's worth a shot, give it a try and see which you prefer.
Freeze your dough into a log and store. Simply take out and slice whenever the craving strikes you. As for me, with a magnificent, but brief, break in the weather, I'm happy to know there lies another batch in my freezer awaiting the next go-around.

Chocolate Chip Cookies

2 1/4 cups pastry flour
1 tsp baking soda
1/2 tsp salt
1 cup butter (2 sticks)
1 cup sugar
1 cup brown sugar
2 tsp vanilla extract
2 eggs
2 cups chocolate chips

Stir flour with baking soda and salt and set aside.
In a large mixing bowl, beat butter with sugars - don't over cream the butter.
Add vanilla and eggs, one at a time, mix until incorporated.
Gradually combine the dry and wet ingredients.
Add chocolate chips and combine thoroughly.
Divide dough into two.
Take one half of dough and lay onto a long piece of plastic wrap.
Form a log and twist the ends for freezer , repeat with 2nd half of dough.
Freeze, or refrigerate for up to 36 hours. (If freezing, you can store for up to 6 months)
Whenever your ready to bake, heat oven to 375.
Prepare a baking sheet with parchment paper.
Slice from frozen log - each piece should be about 1/4 inch thick.
Bake for 7-10 minutes.

Yields roughly 2 dozen cookies.

Tuesday, January 12, 2010

Orange and Oat Scones


Tomorrow marks the day when I (try to) learn how to tickle the keys of my Quickbooks program (bleh), as I have hired an actual real-life book-keeper to come over and show me the ropes. Now, let me tell you, there is a reason I veered towards a career in food rather than one involving addition and subtraction, so this should be interesting! In an effort to woo my teacher, I decided to make these scones to offer her while she shows me where the plus and minus keys are on located on this very keyboard. So I paid a visit to one of my most favorite food blogs, 101cookbooks, to see what Heidi had to offer. Low and behold, these Orange and Oat scones appeared right before my eyes. And now they have appeared on my kitchen counter! If only accounting was so easy! A simple, easy recipe - give it a try.


The original recipe calls for currants, I substituted raisins.

Orange and Oat Scones
From Heidi Swanson, 101cookbooks.com

3 cups whole wheat pastry flour (or all-purpose, or half of each)
1/2 cup turbinado sugar
2 tsp baking powder
1 tsp baking soda
pinch or two of salt
1 cup (2 sticks) cold butter, cubed
2 cups rolled oats
zest of one orange
2/3 cups dried currants, or raisins
sugar for dusting

Preheat oven to 350
Line a baking sheet with parchment paper.
In a food processor, combine flour, sugar, baking powder and soda, salt and pulse to combine.
Add butter and pulse about 20 times, until mixture looks like sandy pearls.
Transfer the dough into a bowl and add oats and zest. Stir to combine.
Add buttermilk and currants - stir until just moistened.

Bring the dough together with your hands - add a splash of buttermilk if too dry- avoid over mixing.
Form roundish balls and place on baking sheet.
Sprinkle with sugar.
Bake for about 15 minutes, or until just turning golden.

Makes about 1 dozen

Thursday, December 17, 2009

Brioche with Chocolate Centers


There is really only one cookbook that truly gets me inspired to step out of my comfort-zone, dig in and try something new. Maybe it's the amazing photos or the simplicity in her recipe writing, but either way, Donna Hay has my number and my kitchen is much better for that! Each time I flip through one of her books or magazines, something inevitably jumps out at me and I'll do whatever it takes to make it as soon as possible. In this case, it was driving to the local grocery this morning, practically in my pjs, to get some butter.
I am no great baker and have never made brioche. But something about tiny little brioche tins and a thought of melted chocolate in the center of eggy, doughy bread got me out of bed earlier than usual today...


Brioche with Chocolate Centers
From Donna Hay, Entertaining, 2003.

Makes 8

2 cups all-purpose flour
1 1/2 tsp dry active yeast
1/2 cup warm milk
1 tsp vanilla extract
3 TBLS sugar
2 egg yolks
4 oz butter, chopped and softened to room temp
8 large chunks dark chocolate, about 1/2 oz each, ( I used Valrhona)

Place the four and yeast in the bowl of an electric mixer fitted with a dough hook.
Place the milk, vanilla and sugar in a separate bowl and mix until combined.
Add the milk mixture and the egg yolks to the flour mixture and beat on med speed until dough forms a smooth ball.
Continue beating, adding butter a little at a time, until incorporated and well beaten.
Cover the dough and set aside for 1 1/2 - 2 hours, or until it has doubled in size.

ALTERNATIVE METHOD (my method)

Mix flour mixture and milk mixture in a bowl until a soft dough forms.
Transfer dough to a lightly floured surface and knead until smooth.
Add butter, a few pieces at a time, and knead until combined.
Cover the dough and set aside for 1 1/2 - 2 hours, or until it has doubled in size.

Once dough had doubled in size, knead on lightly floured surface until soft and elastic.
Divide into 8 equal sized pieces and flatten slightly in your hand.
Place a piece of chocolate in the center of each piece and fold over dough to enclose.
Place the brioche in 8 greased and well - floured brioche tins.
Cover and set aside for 1 hour, or until the dough had doubled in size.
Preheat oven to 350.
Bake for 15-20 minutes, or until the brioche are golden brown.
Serve warmmmmmmm.


Tuesday, December 8, 2009

Christmas Colors


Thursday, November 19, 2009

Vanilla Sugar

I recently hit the mother-load, finding an unusually large amount of vanilla beans hiding in the back of my spice drawer, I must have gone through a weird stock-pile obsession and then forgotten about them. With too many now to know what to do with, my wheels started turning. Making my own vanilla infused vodka was my first experiment, which went exceedingly well, it is simply delicious, and I am now on my 2nd batch. Here, I decided to split the bean and stick in into a jar of sugar. Amazingly, little vanilla seeds fleck the sugar and impart a subtle, but unmistakable vanilla note. Use as you would in any recipe which calls for sugar. Or add to your morning coffee. I must mention, this could make a sweet little sugary gift - (I am all about coming up with different DIY gifts) - the tiny black dots scattered in pure white sugar is quite intriguing and looks really beautiful.

Give it a try, take one vanilla bean (per 2 cups of sugar, roughly), split it lengthwise, and add it to sugar. Mix it well, best to use a jar and shake it to loosen the seeds from the bean. Store in an air tight container with the bean still in the sugar.


Monday, November 16, 2009

Naturally Flavored Vanilla Vodka


I cleaned out my spice drawer the other day and found a few vanilla beans hidden in the back. Score! This was an exciting find as I had just browsed a Donna Hay, (love her!), book of mine and saw a simple way of infusing vanilla bean into vodka. There are artificially flavoured vodkas out there, but I am somewhat of a purist and don't love the idea of fake flavouring, in any form. The recipe I have called for a whole bottle (750 mL) of vodka and 3 vanilla beans. I wasn't sure I was ready to sacrifice a whole bottle to this experiment, so I cut in into a third to see if this was something I might like. Well, one week in the sun, plus an overnight stay in the freezer, and this newly flavoured spirit is a welcomed addition to our liquor cabinet. Serve over ice, or if you can't handle that, (like I can't), it is especially delicious with ginger ale, sort of a grown up vanilla cream soda.


Vanilla Vodka
From Entertaining, by Donna Hay, 1998.

750 ml (24 fluid ounces) of vodka
3 vanilla beans, split

Place the vanilla beans in the vodka and allow to infuse on a windowsill for at least one week. To serve straight, freeze overnight, prior to serving. Serve the vanilla vodka over ice with tonic, soda, or ginger ale.

Want to get even further away from artificially flavoured stuff? Make your own ginger ale!