Tuesday, June 30, 2009

Chili Toasted Pepita Seeds


Pepitas, or pumpkin seeds, have been used through out South America, in particular, Mexico, for centuries. The Aztecs were sure to have eaten them since squash was once of the first domesticated crop in the Western hemisphere. They are full of nutritional benefits, high in zinc, magnesium, potassium and essential fatty acids, (omegas 3 and 6). Though these health benefits diminish once the seed is toasted or roasted, one can't really argue how good these little suckers are when spiked with a little chili powder and salt. (I also eat them in their raw state, by the handful).
Along with this quick stand-by snack, (which I like to use for salads or soup garnishes such as roasted butternut squash, mmm), consider using pepitas for cilantro pesto, or grind them (raw), into a medium powder and press into a piece of ahi, then sear.


The easiest way to make this is with a toaster oven. If you don't have one, preheat your oven to 375 and place seeds on a sheet pan and follow directions below. Pepitas can be found in Latin American markets, and in health food stores.

Chili Toasted Pepita Seeds

1 cup raw pepita seeds
1 - 2 tsp chili powder
pinch of salt
drizzle of olive oil

Place seeds on a tin foil-lined pan, fit for the toaster oven. Toast them for about 4 minutes, or
until you hear them start to "pop".
Place them in a small bowl and while still hot, add chili powder and salt. Drizzle a scant amount of oil just to lightly coat seeds. Toss and allow to cool.
Serve in salads, on top of soups as a garnish, or enjoy as a snack.


Wednesday, June 24, 2009

Mark Bittman's Vegan Chocolate Pudding


Pudding is something that I love, love, love. And about a month ago, fate played a large part in me trying out this recipe... I was on my way to the market, as I pulled up to a red light, I fished for my Food section of the New York Times for some last minute inspiration. Now, if I told you that I had already been craving chocolate pudding that day AND that this recipe was suddenly staring back at me, you'd call me a liar. But, I tell you, it's TRUE! So, needless to say, I picked up everything the recipe called for and in a few short hours, I was in chocolate pudding heaven. I know, I know, very dramatic, but you get the point, this made my day! My thanks to Mr. Bittman for sharing this recipe and I am happy to pass this simple, yummy, and vegan pudding along to you. So go make it, like now!


As Mr. Bittman suggests, spend less time worrying about the brand/quality of tofu (but I encourage you to look for non-GMO), and focus on the quality of the chocolate you buy. I used Ghiradelli semi-sweet chocolate chips.

Mark Bittman's Vegan Mexican Chocolate Pudding
from The New York Times, May 20, 2009.

3/4 cup sugar
3/4 cup water
1 lb. Silken tofu - look for non-GMO/organic
8 oz. good quality semi-sweet or bitter-sweet chocolate, melted* (See note below).
1 tsp vanilla extract
1 1/2 teaspoons ground cinnamon
1/2 tsp chili powder, optional.
chocolate shavings, optional - for garnish.

In a small pot, place sugar + water and heat up until sugar is dissolved. Set aside, allow to slightly cool.
Place all ingredients in a blender or food processor, except chocolate shavings, and blend until completely smooth.
Divide among 6 ramekins and chill for at least 30 minutes. Garnish with chocolate shavings, if you like.

*Note: To melt chocolate, place a heat - proof bowl over a small pot filled with a few inches of water. Bring water to a boil and place pot over it with chocolate chips. Stirring occasionally, the chocolate will melt quickly. See photos above.


Tuesday, June 23, 2009

Greek Style Mahimahi


Lucky me, I have this week off, which is more like lucky husband - because now I can focus my leisure time in our own kitchen.  Before I left for the market today, I glossed over a few of my newest cooking mags and this recipe jumped out at me since I had 2 things on my mind: easy and easier.  It comes from this month's issue (June), of Gourmet, and I tell you, it's good. Often I find that recreating something from a magazine can be disappointing, but this was as promising as it looked.  It calls for mahimahi, but I bet that any firm white fish, such as halibut, sea bass or cod, would work just fine.  The feta and herbs are lovely with the fish and the heirloom tomatoes were all just right.  Served along a simple green salad, this is a great one for a hot summer night.

 
From Gourmet, June 2009.
Serves 4

Greek - Style Mahi Mahi

3 medium tomatoes, cut into large wedges
2 TBLS + 2 tsp extra virgin olive oil, divided
1 TBLS red wine vinegar
4 (6 oz) pieces of mahi mahi, skin attached
1/2 cup mayonnaise
1/4 cup crumbled feta
3 TBLS chopped fresh mint
2 TBLS chopped fresh dill
1 tsp fresh lemon juice
8 very thin lemon slices

Preheat broiler.
Toss tomatoes with 2 TBLS oil, vinegar and salt.
Line a broiler pan with parchment paper.
Place fish skin side down on pan and season with salt and pepper.
Whisk together mayonnaise, feta, herbs and lemon juice and spread over fish.
Place slices of lemon wedges, overlapping, on pieces of fish.
Drizzle with remaining olive oil. (2 tsp).
Broil fish 8 inches from heat until cooked through.  About 15 minutes.  If topping browns too quickly, cover loosely with foil.  Serve with tomatoes.


Saturday, June 20, 2009

Bottega Louie


I have just returned home from a girls' day out, (minus one - pneumonia), in downtown Los Angeles, which comprised of shopping and eating - my two very favorite things. I don't go downtown often, but luckily I was accompanied by my dear friend, Harriet, who works, (and eats), there 5 days a week. So, when our stomachs started growling and we had shopped sufficiently, she suggested we have lunch at Bottega Louie - the hip, new Dean and Deluca-meets-a-Parisian-cafe-on-steroids restaurant on Grand Ave. Louie features a wood burning pizza oven, bakery, patisserie, full bar, gourmet dry and prepared foods, fine wine and cheeses. It is beautifully designed, with stark white walls, an immensely tall ceiling and detail-oriented everything. It's the kind of place where you walk in and just know that the food is good, so it's only a matter of choosing something and then just sitting back and enjoying yourself. Which happens to be exactly what we did!


You can only imagine my elation when I discovered that I actually had my camera with me. I immediately started to snap some shots and a quick look over the menu. We ordered off of the breakfast menu - Lemon Ricotta Pancakes and the Farmer's Market Breakfast (2 poached eggs, along with baby beets, haricot verts, potato, shitake mushrooms and roasted cherry tomatoes), both for $11. Then we ordered from the bar a Bloody Mary for me, ($6 and delicious), and Harriet had a mimosa ($12, equally as delicious). After this, the camera was forgotten and the talking began and didn't stop until we sadly parted ways.
All that was missing, was our girl. Get well, Yvette!


Friday, June 5, 2009

No Artificial Colors!


For a good part of my life, I was a juicing maniac, a la Jack Lelanne.  Every morning, I would consume the juice of apples, carrots, beets, etc.  Basically, any vegetable or fruit in the fridge might find itself in the juicer and then in me.  And it was excellent!  I have since gotten out of the habit, (lazy!),  but I never pass on one if I happen to be in a health food store with a juicer running.  I'll skip the extensive list of health benefits from juicing for now, but I would like to show you a great way to tint icing for cookies or cake without using artificial coloring. (YUCK!) If you don't have a juicer, stop by a health food store and order a few pints of juice to take home. (Make sure to order enough so that you can drink a glass or two, you only need a few TBLS for the cookies!).  Be advised that the juice will not stay drinkable for long, (one day), as they aren't pasteurized.  There are a few companies that make pasteurized vegetable juices, these will be fine.  In this post, I used carrot and beet juices.  You can also try pomegranate or cranberry juice and experiment with these.  
If you are juicing at home, and using more than one type of vegetable for different colors, be sure to run water through the juicer until it runs clear before you switch over, so that you don't muddle your colors.
As with anything that involves sugar, your kids will love this and it might get them to appreciate their veggies a little more!


Icing:

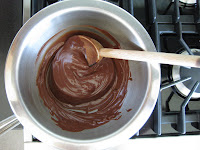
In a bowl of a mixer, beat 1/2 cup of butter (at room temp), until smooth.  Add 1 lb of powdered sugar, 2 TBLS half and half and 2 TBLS vanilla extract.  Beat until very smooth.  
To add coloring, separate icing into a few small bowls, depending on the number of colors you are making.  Add a few drops of coloring (juice) at a time, to bowls and combine.  Be careful not to add too much coloring, as it will eventually water down the icing.


Cookie Dough:

1 cup (1/2 lb butter) at room temp
1/2 cup sugar
2 large egg yolks
1 tsp vanilla extract
zest of 2 limes or lemon (*optional)
2 1/2 cups all purpose flour

Preheat oven to 300.
In a large bowl, beat butter and sugar until smooth  Beat in  yolks and vanilla and zest.  Stir or beat in flour until smooth.
Divide dough in half and flatten each portion to about an inch thick disk.
On a lightly floured surface, roll our dough to about 1/8" and cut dough into shapes with lightly floured cookie cutter.
With an offset spatula, transfer cut outs to a baking sheet lined with parchment paper.
Bake for about 10 - 15 minutes, or until golden.
Transfer cookies onto a cooling rack and allow to cool completely before icing.